Mostrando postagens com marcador linux. Mostrar todas as postagens

quarta-feira, 21 de fevereiro de 2018

Creating custom ISO images for Fedora, CentOS or RHEL

TL;DR: This post is about creating custom ISO images with custom made RPM packages.

Motivation: My motivation was VERY specific. I had to debug a package that had an issue only on first execution after a fresh clean installation - https://bugzilla.redhat.com/show_bug.cgi?id=1518498. This means I had to create a new package and include it on a new custom ISO image every time I wanted to debug a new line or test a new solution.

Also, during the course of this, I faced error messages like:

09:58:3,721 DEBUG packaging: Member: hypervkvpd.x86_64 0:0-0.32.20161211git.e17 - u

09:58:3,727 ERR packaging: Error populating transaction after 10 anaconda retries: 
failure: Packages/hypervkvpd-0-0.32.20161211git.e17.x86_64.rpm from anaconda: 
[Errno 256] Mo more mirrors to try

09:58:3,727 DEBUG packaging: file:///run/install/repo/Packages/hypervkvpd-0-0.32.
20161211git.e17.x86_64.rpm: [Errno -1] Header is not complete.


The trick is very simple, first create your RPM package - here I assume you already know how to do that. Make sure your package has the same name and same dependencies than the one you want to replace. After that, you're ready to start building the new custom ISO image:

1. Download and mount the ISO image you want to customize:
# mount -t iso9660 -o loop RHEL-7.5-20180206.n.0-Server-x86_64-dvd1.iso temp/


2. Create the root directory for the new ISO image:
# mkdir iso_build

3. Copy everything from the original ISO to your newly created root directory:
# cp -pRf temp* iso_build/

4. Place your newly created RPM inside the iso_build/Packages/ directory;

5. Remove all hash data from repodata/ directory, but KEEP the comps file:
# rm -rfv repodata/*.gz repodata/*.bz2;

6. Create the new repository hash information, using as a reference the old comps file you didn't delete:
# createrepo /root/iso_build/Packages -g /iso_build/repodata/ -o /iso_build/ \
-u file:///run/install/repo/Packages/;

7. From inside iso_build/, generate the new ISO image:
# genisoimage -U -r -v -T -J -joliet-long -V 'RHEL-7.5 Server.x86_64'         \
-volset 'RHEL-7.5 Server.x86_64' -A 'RHEL-7.5 Server.x86_64'                  \
-b isolinux/isolinux.bin -c isolinux/boot.cat -no-emul-boot                   \
-boot-load-size 4 -boot-info-table -eltorito-alt-boot                         \
-e images/efiboot.img -no-emul-boot -o /RHEL-7.5-DEBUG-Server-x86_64-dvd1.iso .

Special thanks to Arx Cruz and Edjunior Machado who helped me on this issue.

Enjoy your debugging.

sexta-feira, 9 de fevereiro de 2018

QEMU Sandboxing for dummies

DevConf is an annual conference that takes place in Brno, Czech Republic. This year I applied for a talk to go over my work that I develop since mid 2012: Security on QEMU/KVM Virtual Machines using SECCOMP. Since then I became the maintainer of this feature on QEMU and released the second and better version not long ago. On this post you'll find the slides and the full video of the presentation.


So here we go, very first experience lecturing in English, what a catastrophe! In my defense the audience was very peculiar, not only the guy that very started libseccomp was there, but my manager and the director of the department as well. Anxiety apart, I think it was an outstanding experience, would do it again in the future. :-)


segunda-feira, 8 de junho de 2015

GSM bridge between two raspbx hosts

Disclaimer: I know there's a lot of options on the market for free long distance calls like Skype, Viber, WhatsApp and so on. The goal of this personal project was all along to come up with a proof of concept that actually works, study something different other than my actual job and, why not, have some fun :) BUT, yes, there's one single use case that this setup will be useful: You're in the middle of nowhere, no internet connection and you need to call someone in the other side of the planet but you don't want to pay a long distance call: BINGO!

Disclaimer2: For this tutorial you'll have to be prepared for Asterisk terminologies like trunks and channels. If you're not familiar with this vocabulary, please take a quick look at this documentation.

Description of the environment: The server1 is placed on the Brazilian side. It's a Raspberry Pi model B that runs an asterisk-modded-for-raspberry-pi distro called raspbx. Attached to it there's an USB GSM dongle with a SIM card for the local Brazilian operator. In the same network of my server1 there's a Cisco PAP2t Internet Phone Adapter and, attached to it, a regular land line telephone. The same setup is duplicated on the German side, except that the Raspberry Pi is model B+.

5VpNk+MmEP01rkouqZFky7PHzGZ2ctmqVPmwyRFLjESNJFQIf82v30ZqJNBHxh47yFXxxaIFNLzmPRrsRfA1P74IUqbfeUyzhf8QHxfBHwvf95bBF/hSllNjeVyvGkMiWIyVOsOGvVM0PqB1x2JaWRUl55lkpW2MeFHQSFo2IgQ/2NVeeWZ7LUmiPXaGTUSyofUHi2WKs/DDzv4nZUmqPXshTnhLordE8F2B/hZ+8Fp/mtc50X3hRI8PTXGJ7U9YXi+1p8Ia0TvnuWUQtGrRwz5fGQ4Ly1suYioak7ZlrHgzMQqeIZyCc2ipnvLjV5qpkOpoNc2+Tbxt4RK0sHxPNgiaFpU8achpDBHAIhcy5QkvSPbcWZ9qWKnqAUB6SmWewaMHj/TI5N/G8z+qym8rKFWSCPm7WhCq1z2BFo3tG4PxYIsi7tUAi/E+2ol97VUVmmGrsU7OHE0V34kIa+FswXFCsVbNBwTnhfKcSnGqw5kRyfZ27wQjlbT1OmjhAdEdRxpdw8R22KkgVbmlonZXsoUfZjCkp5jt4TFRjyOmXyoKIAjvV/0O3I606Ft7IT6kTNJNSWpYDqAcdhhxpFRIqoVkAt0hbthAywzKTvCA5YNBYmRAavBX264BGglrAL2rtmB42XxXQsiLBGAYQTYH8cyngZ0bQt8bQrgegfDLDSDUri5SBYueM0nE51QBZ2uqQr2/OFAFdG2qAt9J2CTcr7c26pqzK3ecxe3cgIEVgEIB4XAPRLB6tIEIh0B4ev82kQhvQT29Pm+zIX/Al3M49zlOrYecqlF1wCkPdwCn6gVYiJN6pVrUhXtQtpEouMp30LVB6ZKU9VGBVREfrnLnG+rSYU6CgmKAIWlGy5QXdA4k9JQQidWZqYW2XYOEXhf/ITlrBt5JauGNMNCrj5guhHDIwSvOHP69nzlCvT5nOHR4Q4ZfcOqYhtY9iD1tcHns8PHuxak2tBt3IwJ3snE3GjHPmUT7vodDySqY71CiU/y7T8XNhaMM/YWj754uSJX0/a/OlR4R9qvwRI38n2z9Y5FwtvVr5xPpN76ddXt2mX+P3L62Cfg8WNiy5jIDD7APA4utIO8sY/ATh05Y4OblwMXbkLBZBj/9KGI60H57veh18NEtzC3WS4CDNTAaQtGpRpSRqmKRjYClPF2Nz16vDGEygNBQmTho29nagh7+4nD31kXB620F7baou2g0D1uZPzV90JHXvy5rhHLQUR2rdtrnhW+ofgkVuVrfIcnVSi22lfqqF/sgKW8X/1k5uUtKhD1OaBlxwomhht4fJybyF28kbfw3zpxPj76n9rx0KT0mh3w1PaDY/aDcVO/+LBA8/wQ=
What it does: This is the list of features that this project performs right now:
  1. Someone in Brazil calls my Brazilian number, the dongle1 answers the call, redirects to an IAX2 trunk directly to server2. The server2 takes this incoming call and uses the dongle2 to place a new call to my german cellphone. The other way is still pinned to a single phone -- like, call my dongle2 to reach a single number in Brazilian side -- but improvements are coming.
  2. Someone uses phone1 on Brazilian side to call extension phone2 on German side (and vice-versa) like a regular landline phone.
  3. Someone uses phone1 or phone2 to reach my german cellphone.

Ok, so LET'S DO IT!!

I'm gonna skip the PAP2t configuration because I think it's too much. This is only needed if you want to use land line telephones, it's not required for the GSM bridge. If anyone is interested in doing that, please leave a comment and I'll write a new post only for that configuration.

Important note: All the configuration explained from now on is identical on both servers.
  1. Install raspbx on your RPi's SD card. Also take a time to read through the raspbx documentation, which is very useful
  2. Use the script install-dongle (built-in inside raspbx) to install your dongle on your RPi. Important notes regarding problems I got:
    1. There's a list of GSM dongles that are tested with voice, SMS and USSD. I bought the Huawei E160;
    2. I had to unlock the voice feature with DC-Unlocker for Windows;
    3. Plug your dongle and only after that plug your RPi power. If you try to plug your dongle while the RPi turned on, you may experience your RPi to reboot due to power consumption failures;
    4. If your RPi starts rebooting it's because it can't handle the gsm dongle power consumption, in this case, use a proper powered USB hub. I bought the D-Link Dub-H7
    5. Find out the IMEI and the IMSI code of your dongle and set the correct values under /etc/asterisk/dongle.conf because /dev/ttyUSB1 or /dev/ttyUSB2 may change;
  3. Before you start configuring raspbx itself, it's important that you have both sides with network configured properly with static IPs and (in my case) DynDNS. I didn't want to open too many ports on the routers on both sides so I just setup an OpenVPN vpn; 
  4. Setup a new custom trunk for your dongle under Connectivity  Trunks  Add Custom Trunk and set these values:

    Trunk Name: to-my-cellphone
    Outbound CallerID: Your SIM card number with country code (with a plus sign at the beginning)
    Custom Dial String: dongle/dongle0/$OUTNUM$

    Note: This is the trunk that will actually place the inbound calls to your personal telephone.

  5. Setup a new IAX2 trunk under Connectivity  Trunks  Add IAX2 Trunk and set these values:

    General Settings:
    Trunk Name: Something that would remember the incoming connection from the other server
    Outbound CallerID: Your personal phone number

    Outgoing Settings:
    Trunk Name: (same as above, I also used the same name and it's ok)

    host=static IP under vpn of the remote server
    username=any username
    secret=any password
    type=friend
    trunk=yes
    qualify=yes
    qualifyfreqok=25000
    tos=0x18

    Note: The IAX2 trunk is responsible for redirecting calls from this server to the other.

  6. Setup a new inbound route under Connectivity  Inbound Routes → Add Incoming Route:

    DID Number: Your SIM card number with country code (with a plus sign at the beginning)
    CallerID Number: Your personal cell phone number
    Set Destinations: Trunk and your recently created IAX2 trunk.

    Note: This is the route responsible to redirect an inbound call on your local dongle over the IAX2 trunk and then to your remote server.
If you noticed any omitted fields in the above configurations, it's because I didn't fill with anything or it's not important. I also did some extra work on Claning the SIM card memory for SMS every once in a while, I set a static IP for the OpenVPN so each server can always see each other, an additional service to check my credit balance every month and so and so forth. If you also want details like that please let me know in the comments :-) 

That's it! You did it! If you need more help setting up anything else please let me know in the comments of this post. Good luck and have fun! :-)

terça-feira, 9 de agosto de 2011

Enjoy old SNES games on your Xoom using PS3 controller

(image from eu, android)

Yes, that exactly what you read. Now you can play SNES games on your Motorola Xoom using your PS3 controller over bluetooth. Also, this tutorial is an adaptation from an article at Eu, Android and it's intended to be used on Ubuntu only, if you need to use the other OS, please check the original. The Linux specific information is from a cached ubuntu wiki, so I'll copy & paste the relevant part here in case it expire in the future. Right, so cut the crap and let's play! :-)


Needless to say, you must have proper root access on your device - details for brazilians here.

  1. Install Sixaxis Compatibility Checker, open the application, give root permissions and then a popup message will be shown telling you if your device is supported or not (hopefully yes).

  2. Install required libs:
    $ sudo apt-get install libusb-dev libusb-0.1-4

  3. Download sixpair.c (original also hosted at the ubuntu wiki, I did a copy on my github)

  4. Compile it:
    $ gcc -o sixpair sixpair.c -lusb

    Before running sixpair, you'll need the bluetooth mac addr of your Xoom. The easy way to get it is installing Sixaxis Controller - don't worry, you'll need the app anyway to use the controller. The app will display a message "Local Bluetooth Adderss" with the bluetooth mac addr you'll need.

  5. Run sixpair with the Motorola Xoom bluetooth mac addrs you just got as a parameter:
    $ ./sixpair 41:f4:89:6d:41:73

  6. Open the Sixaxis Controller and follow the onscreen instructions - important note: You'll might need to reboot your Xoom to make it work (I had to)
 NOW I WANNA PLAY!
easy... almost there

Install a neat SNES emulator, I choosed Snes9x EX. Now you have to configure your controller to map the keys the emulator uses: Go to Sixaxis Controller -> Menu -> Preferences -> Input Mapping -> 1st Controller mappings. Since I am using Snes9x EX, I set my mapping like this:
  • square: A
  • triangle: S
  • circle: X
  • cross: Z
  • left: Q
  • right: W
  • select: SPACE
  • start: ENTER
  • power: HOME
This way, for example, Snes9x EX will understand that when you press square you're actually pressing A which means the Y button on a normal SNES controller. Yes, I know, confusing as hell, but works.

Now go and have fun :-D

sábado, 26 de junho de 2010

Libvirt-0.8.2 is out. IBM pHyp driver now supports IVM and storage management

Libvirt-0.8.2 is finally out. New pHyp features are now available :-) I've been working hard for the last couple of weeks to finish all the support for the IVM, IBM Integrated Virtualization Manager. Now the phyp driver is able to manage both HMC/VIOs and IVM virtualized systems. Also, another big feature that is now available is the storage management. The whole stack of storage (pools and volumes) can now be managed with Libvirt.


I couldn't get to this without the help of Eric Blake (from Red Hat), helping reviewing my patches and Brian King (from IBM), helping me understand the whole world of IBM virtualization . Thank you, guys :)

segunda-feira, 17 de maio de 2010

GasFinder hits N900!

I am proud to announce that this weekend GasFinder hit the Maemo Fremantle system. It was a great hacking time this weekend, my girlfriend lovely understood (thank you!). And finally I could complete the port and all that packaging stuff to release the first working version of GasFinder this early monday :-)

This great effort is mostly because of the "Virada Hacker" that happened in SP/Brazil this weekend. The main focus of the event is to work on public government data. And what are the odds, great time to go back and hit some gas on GasFinder. :P
GasFinder still without its own icon


The list of gas stations after the automatic search and the price of gas


The detailed screen and all fuel prices listed

Obviously we have a great list of TODO's ahead of us, UI, mapping, and interactions with social networks would be fine. And now, I think it is already more than a proof of concept :) You can download the deb package right from the repository.

Enjoy! :-)

update: Now we changed to GiHub, hooray! \o/

quarta-feira, 14 de abril de 2010

Ethernet over USB with N900 and Gentoo

Meta: It's been a while since I got my new N900. I sold my old device to Kleber and I acquired the new N900 from Etrunko, hell I wanted this gadget. This tutorial is for gentooers only, ubuntuers can connect and use it right away without any changes.


Since that date, I've been playing and hacking around this incredible device. Yesterday I was trying to debug why in hell my bloody bastard wifi connection keeps on dropping so often. Opening a terminal and checking dmesg or /var/log/messages on that tiny little screen was a pain, so I decided to try out the ethernet over usb.

You can follow all the above tutorial on a Gentoo box. The only problem I found was to find the correct modules in my kernel to load - as Gentoo doesn't behave as Ubuntu and loads the whole world in the memory. :P

So, here it is:

otubo@minivader ~ $ lsmod|grep usb
usbnet 17188 1 cdc_ether
mii 5212 1 usbnet

Find, compile (if not yet) and load these modules. These modules, with the correct udev rules will create a usb0 interface on both devices. Make sure the interfaces are configured properly to be on the same network.

That's it. Now you're able to plug you USB cable and have a full operational network with it. Enjoy! :-D

[update] DO NOT set a static mac add as said in the original tutorial. In my case, the module g_nokia didn't load just because of this.

quarta-feira, 16 de dezembro de 2009

VIVO 3G using Huawei e1756 on Ubuntu 9.10 Karmic

Quick and fast tip to show a way to connect to 3G using Hawei e1756 modem on Ubuntu 9.10 Karmic.

The problem: The modem itself has a little micro-SD card reader inside and guess what? The kernel identifies it as card reader and not as a 3G modem. Good. ¬¬"

The fix: To solve this minor issue, first you have to install a tool that helps you to switch between storage device and usb serial device, the usb_modeswitch. For this just apt-install the usb-modeswitch package.

Then, modify its config file (/etc/usb_modeswitch.conf) adding the lines below:
# Huawei E1692/E1756
DefaultVendor= 0x12d1
DefaultProduct= 0x1446

TargetVendor= 0x12d1
TargetProduct= 0x140c

MessageContent="55534243000000000000000000000011060000000000000000000000000000"

CheckSuccess=5

These lines tells your usb_modeswitch that if the vendor id 0x12d1 and the product id 0x1446 are found on your usb devices, then it will be switched to product id 0x140c. It means that the usb_modeswitch will switch from storage device to 3G modem. So far so good. :)

Then we have to write a udev rule that tells the system to ignore the card reader and identify it as a 3G modem as we plug it in. Write a file named /etc/udev/rules.d/15-hauwei.rules containing these lines:

SUBSYSTEM=="block", \
ACTION=="add", \
SYSFS{idVendor}=="12d1", \
SYSFS{idProduct}=="1446", \
OPTIONS="ignore_device"

SUBSYSTEM=="usb", SYSFS{idProduct}=="1446", SYSFS{idVendor}=="12d1", RUN+="/usr/sbin/usb_modeswitch"

Your udev now will run usb_modeseitch every time you plug in an usb stick with product id and vendor id matching those values.

Restart your udev:
$ service udev restart

And now, your system should be able to identify your 3G modem. After all these done, you have to configure your NetworkManager. This last step is pretty simple and strightforward, so, I will let you handle this by yourself :)

Any problems please feedback!

[update] I wrote this post drinking wine (long story) and I completely forgot to thank Ursinha for the usb_modeswitch tip. Soooorry and thank you bro! :-)

[update 2] And it seems that NetworkManager doesn't like 3G modems, at least not now. So I had to configure some extra lines on /etc/wvdial.conf and /etc/ppp/options in order to use wvdial and connect using /dev/nail (yeah, that was a joke, there is no such a device):

otubo@minivader ~ $ cat /etc/wvdial.conf

[Dialer 3g]
; Init2 = ATQ0 V1 E1 S0=0 &C1 &D2 +FCLASS=0
Modem Type = Analog Modem
; Phone =
ISDN = 0
; Username =
Init1 = ATZ
Init2 = ATQ0 V1 E1 S0=0 &C1 &D2
; Init3 = AT+CGDCONT=1,"IP","zap.vivo.com.br"
; Password =
Modem = /dev/ttyUSB0
Baud = 921600
DialCommand = ATDT
Check Def Route = on
FlowControl = Hardware(CRTSCTS)
; Username = 1997848815@vivozap.com.br
Username = vivo
Password = vivo
Phone = *99#
Stupid mode = 1
Auto Reconnect = on
Auto DNS = on

otubo@minivader ~ $ egrep -v '#|^ *$' /etc/ppp/options
asyncmap 0
noauth
crtscts
lock
hide-password
modem
proxyarp
lcp-echo-interval 30
lcp-echo-failure 4
noipx
asyncmap 0xa0000
mru 1500
refuse-chap
ipcp-max-failure 30


Then, to connect to internet using your 3G modem you just have to run:

root@minivader:~# wvdial 3g
--> WvDial: Internet dialer version 1.60
--> Cannot get information for serial port.
--> Initializing modem.
--> Sending: ATZ
ATZ
OK
--> Sending: ATQ0 V1 E1 S0=0 &C1 &D2
ATQ0 V1 E1 S0=0 &C1 &D2
OK
--> Modem initialized.
--> Sending: ATDT*99#
--> Waiting for carrier.
ATDT*99#
CONNECT
--> Carrier detected. Starting PPP immediately.
--> Starting pppd at Thu Dec 17 20:38:52 2009
--> Pid of pppd: 3488
--> Using interface ppp0
--> local IP address 187.88.116.150
--> remote IP address 10.64.64.64
--> primary DNS address 200.142.130.202
--> secondary DNS address 200.220.227.100

And this time, special thanks to Kleber that helped me debugging that shit :-)

sexta-feira, 16 de outubro de 2009

How to connect a GPS phone to a Computer via bluetooth

A very quick post to show how these things work togheter. I connected a Nokia E71 GPS to my ThinkPad T61 running Ubuntu 9.04 Janty Jackalope using bluetooth connection. The initial idea was to use Google Earth as my main GPS screen while driving, but unfortunately I couldn't make it work *yet*.

Step 1) Going right to the point: First you need to be sure that you mobile phone exports the GPS service via bluetooth. And that's simple to get. First you must edit yout /etc/bluetooth/hcid.conf to look like this:

root@phoenix:/etc/bluetooth# cat hcid.conf
#
# HCI daemon configuration file.
#

# HCId options
options {
# Automatically initialize new devices
autoinit yes;

# Security Manager mode
# none - Security manager disabled
# auto - Use local PIN for incoming connections
# user - Always ask user for a PIN
#
security none;

# Pairing mode
# none - Pairing disabled
# multi - Allow pairing with already paired devices
# once - Pair once and deny successive attempts
pairing multi;

# PIN helper
#pin_helper /usr/bin/bluepin;

# D-Bus PIN helper
#dbus_pin_helper;
}

# Default settings for HCI devices
device {
# Local device name
# %d - device id
# %h - host name
name "otubotp";

# Local device class
class 0x3e0100;

# Default packet type
#pkt_type DH1,DM1,HV1;

# Inquiry and Page scan
iscan enable; pscan enable;

# Default link mode
# none - no specific policy
# accept - always accept incoming connections
# master - become master on incoming connections,
# deny role switch on outgoing connections
lm accept;

# Default link policy
# none - no specific policy
# rswitch - allow role switch
# hold - allow hold mode
# sniff - allow sniff mode
# park - allow park mode
lp rswitch,hold,sniff,park;

# Authentication and Encryption (Security Mode 3)
#auth enable;
#encrypt enable;
}


Step 2)
Restart you bluetooth daemon:

root@phoenix:~# /etc/init.d/bluetooth restart
* Stopping bluetooth [ OK ]
* Starting bluetooth [ OK ]


Step 3) Turn on the bluetooth on your phone and get ready to scan devices:

root@phoenix:~# hcitool scan
Scanning ...
00:21:FE:xx:xx:xx mycellphone


Step 4) Then, check if your phone exports GPS data via bluetooth running sdptool. In this step you need to pay attention to the Service Names and to the channel they use. We're gonna use these informations later on.

root@phoenix:~# sdptool browse 00:21:FE:F8:2F:E2
Browsing 00:21:FE:F8:2F:E2 ...
Service Name: AVRCP Target
Service Description: Audio Video Remote Control
Service Provider: Symbian Software Ltd.
Service RecHandle: 0x10000
Service Class ID List:
"AV Remote Target" (0x110c)
Protocol Descriptor List:
"L2CAP" (0x0100)
PSM: 23
"AVCTP" (0x0017)
uint16: 0x100
Profile Descriptor List:
"AV Remote" (0x110e)
Version: 0x0100

Service Name: Hands-Free Audio Gateway
Service RecHandle: 0x10004
Service Class ID List:
"Handsfree Audio Gateway" (0x111f)
"Generic Audio" (0x1203)
Protocol Descriptor List:
"L2CAP" (0x0100)
"RFCOMM" (0x0003)
Channel: 1
Language Base Attr List:
code_ISO639: 0x454e
encoding: 0x6a
base_offset: 0x100
Profile Descriptor List:
"Handsfree" (0x111e)
Version: 0x0105

Service Name: Headset Audio Gateway
Service RecHandle: 0x10005
Service Class ID List:
"Headset Audio Gateway" (0x1112)
"Generic Audio" (0x1203)
Protocol Descriptor List:
"L2CAP" (0x0100)
"RFCOMM" (0x0003)
Channel: 2
Language Base Attr List:
code_ISO639: 0x454e
encoding: 0x6a
base_offset: 0x100
Profile Descriptor List:
"Headset" (0x1108)
Version: 0x0100

Service Name: Audio Source
Service RecHandle: 0x10027
Service Class ID List:
"Audio Source" (0x110a)
Protocol Descriptor List:
"L2CAP" (0x0100)
PSM: 25
"AVDTP" (0x0019)
uint16: 0x100
Language Base Attr List:
code_ISO639: 0x454e
encoding: 0x6a
base_offset: 0x100
Profile Descriptor List:
"Advanced Audio" (0x110d)
Version: 0x0100

Service Name: AVRCP Controller
Service Description: Audio Video Remote Control
Service Provider: Symbian Software Ltd.
Service RecHandle: 0x10028
Service Class ID List:
"AV Remote" (0x110e)
Protocol Descriptor List:
"L2CAP" (0x0100)
PSM: 23
"AVCTP" (0x0017)
uint16: 0x100
Profile Descriptor List:
"AV Remote" (0x110e)
Version: 0x0100

Service Name: SyncMLClient
Service RecHandle: 0x10029
Service Class ID List:
UUID 128: 00000002-0000-1000-8000-0002ee000002
Protocol Descriptor List:
"L2CAP" (0x0100)
"RFCOMM" (0x0003)
Channel: 10
"OBEX" (0x0008)
Language Base Attr List:
code_ISO639: 0x454e
encoding: 0x6a
base_offset: 0x100
Profile Descriptor List:
"" (0x00000002-0000-1000-8000-0002ee000002)
Version: 0x0100

Service Name: OBEX File Transfer
Service RecHandle: 0x1002a
Service Class ID List:
"OBEX File Transfer" (0x1106)
Protocol Descriptor List:
"L2CAP" (0x0100)
"RFCOMM" (0x0003)
Channel: 11
"OBEX" (0x0008)
Language Base Attr List:
code_ISO639: 0x454e
encoding: 0x6a
base_offset: 0x100
Profile Descriptor List:
"OBEX File Transfer" (0x1106)
Version: 0x0100

Service Name: Nokia OBEX PC Suite Services
Service RecHandle: 0x1002b
Service Class ID List:
UUID 128: 00005005-0000-1000-8000-0002ee000001
Protocol Descriptor List:
"L2CAP" (0x0100)
"RFCOMM" (0x0003)
Channel: 12
"OBEX" (0x0008)
Language Base Attr List:
code_ISO639: 0x454e
encoding: 0x6a
base_offset: 0x100
Profile Descriptor List:
"" (0x00005005-0000-1000-8000-0002ee000001)
Version: 0x0100

Service Name: SyncML DM Client
Service RecHandle: 0x1002c
Service Class ID List:
UUID 128: 00000004-0000-1000-8000-0002ee000002
Protocol Descriptor List:
"L2CAP" (0x0100)
"RFCOMM" (0x0003)
Channel: 13
"OBEX" (0x0008)
Language Base Attr List:
code_ISO639: 0x454e
encoding: 0x6a
base_offset: 0x100
Profile Descriptor List:
"" (0x00000004-0000-1000-8000-0002ee000002)
Version: 0x0100

Service Name: Nokia SyncML Server
Service RecHandle: 0x1002e
Service Class ID List:
UUID 128: 00005601-0000-1000-8000-0002ee000001
Protocol Descriptor List:
"L2CAP" (0x0100)
"RFCOMM" (0x0003)
Channel: 14
"OBEX" (0x0008)
Language Base Attr List:
code_ISO639: 0x454e
encoding: 0x6a
base_offset: 0x100
Profile Descriptor List:
"" (0x00005601-0000-1000-8000-0002ee000001)
Version: 0x0100

Service RecHandle: 0x1002f
Protocol Descriptor List:
"L2CAP" (0x0100)
"RFCOMM" (0x0003)
Channel: 3

Service Name: Dial-Up Networking
Service RecHandle: 0x10030
Service Class ID List:
"Dialup Networking" (0x1103)
Protocol Descriptor List:
"L2CAP" (0x0100)
"RFCOMM" (0x0003)
Channel: 4
Language Base Attr List:
code_ISO639: 0x454e
encoding: 0x6a
base_offset: 0x100
Profile Descriptor List:
"Dialup Networking" (0x1103)
Version: 0x0100

Service Name: OBEX Object Push
Service RecHandle: 0x10031
Service Class ID List:
"OBEX Object Push" (0x1105)
Protocol Descriptor List:
"L2CAP" (0x0100)
"RFCOMM" (0x0003)
Channel: 9
"OBEX" (0x0008)
Language Base Attr List:
code_ISO639: 0x454e
encoding: 0x6a
base_offset: 0x100
Profile Descriptor List:
"OBEX Object Push" (0x1105)
Version: 0x0100

Service Name: Imaging
Service RecHandle: 0x10032
Service Class ID List:
"Imaging Responder" (0x111b)
Protocol Descriptor List:
"L2CAP" (0x0100)
"RFCOMM" (0x0003)
Channel: 15
"OBEX" (0x0008)
Language Base Attr List:
code_ISO639: 0x454e
encoding: 0x6a
base_offset: 0x100
Profile Descriptor List:
"Imaging" (0x111a)
Version: 0x0100

Service Name: SIM Access
Service RecHandle: 0x10033
Service Class ID List:
"SIM Access" (0x112d)
"Generic Telephony" (0x1204)
Protocol Descriptor List:
"L2CAP" (0x0100)
"RFCOMM" (0x0003)
Channel: 8
Language Base Attr List:
code_ISO639: 0x454e
encoding: 0x6a
base_offset: 0x100
Profile Descriptor List:
"SIM Access" (0x112d)
Version: 0x0101

All you need to check on this huge amount of data is something telling that you phone exports the GPS information. In the above example there is no such thing. If your phone DOES support this information go to step 5. Otherwise, install this strategic application for Symbian: ExtGSP. This little tricky app will do all the messy thing for you exporting all the GPS data over the bluetooth connection. Then re-run the sdptool command again to check. In the end you will find additional information about ExtGPS:

Service Name: Symarctic ExtGPS
Service Description: Share phone's built-in GPS module via Bluetooth
Service Provider: Symarctic Solutions
Service RecHandle: 0x10034
Service Class ID List:
"Serial Port" (0x1101)
Protocol Descriptor List:
"L2CAP" (0x0100)
"RFCOMM" (0x0003)
Channel: 5
Language Base Attr List:
code_ISO639: 0x656e
encoding: 0x6a
base_offset: 0x100


Step 5) Then, edit your /etc/bluetooth/rfcomm.conf and make it look like this:

root@phoenix:~# cat /etc/bluetooth/rfcomm.conf
rfcomm4 {
bind yes;
device 00:21:FE:F8:2F:E2;
channel 5;
comment "Serial Port";
}


Step 6) Once configured (and ExtGPS running on your phone) you will now open a communication channel and bind it to a local device like this:

root@phoenix:~# rfcomm connect 4
Connected /dev/rfcomm4 to 00:21:FE:F8:2F:E2 on channel 5
Press CTRL-C for hangup


Step 7) Now there's a bunch of GPS information being written on /dev/rfcomm4. In order to make a good use of it, we should grad all these information, and parse it with gpsd:

root@phoenix:~# gpsd -N /dev/rfcomm4
(-N means not to daemonize it, to see all the debug info.)


What's next? Now we have all the setup ready: Cellphone with GPS up and running, exporting information via bluetooth (using ExtGPS), connected and writing information on a local device, and a daemon grabing and parsing all the information. Good! We just need a client program to enjoy the show:

Step 8) You can use a bunch of client programs, I've tested two of them: Xgps and GpsDrive.
Xpgs is a very simple program just to make sure things are working fine. It shows the position of satelites, the current position and so on. Here is a print screen:


GPSDrive is more Google-Earth-like, you may track you path during a travel, check the map and so on:


Well, that's it. Hope you enjoy :)

terça-feira, 6 de outubro de 2009

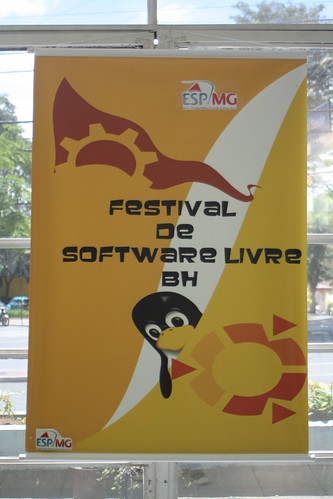
Primeiro Festival de Software Livre de Belo Horizonte

Impressionante, quase mais de uma semana depois e cá estou eu mineirando[1] um tempo livre pra conseguir escrever algumas linhas sobre o assunto.

o primeiro de muitos
(cartaz do evento)

Organização e Infra:
A organização foi bastante competente, não houve nenhum gap - ou pelo menos nenhum que eu tenha percebido. Wifi funcionando em quase 100% do evento e horários de palestras ok - exceto por uns palestrantes furões. Falando em palestrantes...

Palestras:
Ok, confesso que acordei tarde e que cheguei quase na hora do almoço no evento. Ok, *na hora do almoço*. Gastei boa parte da tarde revisando e corrigindo a minha própria palestra.

Mas uma palestra em especial merece algumas linhas a mais: Deixo aqui os parabéns ao Lamarque pela sua palestra-história-de-vida. Passou quase uma hora e meia falando de suas experiências pessoais em escrever driver de kernel, postar na LKML, ser tratorado, resolver bugs postar patches e por ai vai. Gostei disso por dois motivos claros: 1) Isso representa fortemente o espírito de nerd && computeiro - fazer a coisa funcionar por que *pode* e não por que quer provar alguma coisa ou por que alguém mandou. Pelo simples fato de estar interessado e querer resolver. 2) O conteúdo técnico pouco importava, a idéia era que "contribuir com SL não é um bixo de 9 cabeças". Vai lá, leia a documentação, fale com a galera no canal, poste e por ai vai. No fear.

(minha palestra do vimbook - crédito: Djavan)

Falando em palestras, a minha sobre vimbook foi bem divertida. O público era bastante interessado, os exemplos funcionaram na hora e o mais importante: As minhas piadas sem graça mantiveram as pessoas acordadas mesmo depois do devastador almoço de comida mineira. Great! Piadas a parte, o que gostei mesmo foi que as pessoas ficaram interessadas no vimbook, muitos anotaram a URL, perguntaram sobre o projeto e tal. Mission accomplished feelings.


E uma coisa que eu não canso de repetir: Em eventos desse tipo, a coisa que menos importa é ficar na sala prestando atenção na palestra. O networking no boteco pós evento é sempre mais importante. Conhecer pessoas novas, em que trabalham, trocar idéias, links, conexões em redes sociais e por ai vai :-)

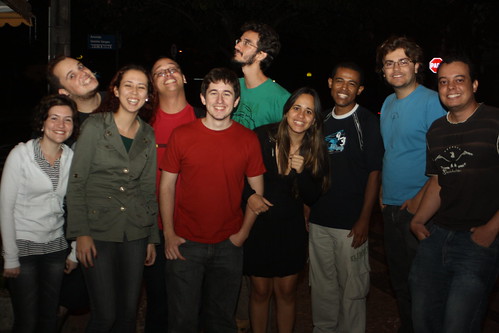
o baile todo
(pessoas de belzônte, porto alegre-tchê e bahia, networking é isso aí ó)

Parabéns a todos da orgzanização, palestrantes e amigos. E que venha o próximo! :-)
Algumas fotos do evento no meu flickr, no flickr do Tuliom e no picasa do Djavan.

[update] os slides da minha palestra estão aqui:


[1] - Ahn?! Ahn?! Entendeu?!

quinta-feira, 17 de setembro de 2009

Software Freedom Day '09 na UNESP Rio Claro parte 2

E o que mais me agradou em ir ao Software Freedom Day da Unesp este ano, foi que a platéia não tinha apenas alunos da Unesp, mas de outras instituições de ensino da região. É sempre interessante espalhar os conceitos e idéias pra mais gente :) Bem, ai estão os slides, e já que estamos falando em licenças a minha palestra está em CC. :)


quarta-feira, 9 de setembro de 2009

Software Freedom Day '09 na UNESP Rio Claro

Novamente fui honrado com o convite de dar uma palestra no Software Freedom Day da UNESP de Rio Claro. O evento é mundial e acontecerá dia 15 de setembro na UNESP Rio Claro.


Vou preparar alguns slides sobre licenças de software. Vou falar um pouco sobre licenças, Creative Commons, DRM e por ai vai. Em breve mais notícias! Apareça lá na UNESP, 15 de setembro, 20h! :)

Use your cellphone bluetooth to set your status on IM's

meta: Another tip from my spare time on my vacations. :)

The idea is simple, put your cellphone on your pocket and set the status of your IM's as you walk away from your PC. Easy like that. The basic concept is to write a shell script that checks if your cellphone is around using the bluetooth protocol and put it on the crontab. If your cellphone is not around, the script sets away on both Xchat and Pidgin and so on. Well, talk is cheap...

First of all, turn you cellphone bluetooth on, then check its MAC address with hcitool:
otubo@phoenix ~ $ hcitool scan
Scanning ...
00:1F:DE:4A:AD:C1 otubophone

After, write a simple shell script that tries to match the name of the device with the MAC address. If the cellphone is not around, then set the status of your Xchat and Pidgin to "Away From Keyboard" and lock the screen, otherwise, set the status as "Available". (I didn't unlocked the screen for security reasons, I do prefer typing the password instead)

#!/bin/bash

MAC="00:1F:DE:4A:AD:C1"
NAME="otubophone"
CMD=`/usr/bin/hcitool name $MAC`

if [[ $CMD != $NAME ]]; then
xchat --existing --command="ALLSERV away";
xchat --existing --command="ALLSERV nick otubo[AFK]";
purple-remote "setstatus?status=away&message=Away From Keyboard";
gnome-screensaver-command --lock;
else
xchat --existing --command="ALLSERV back";
xchat --existing --command="ALLSERV nick otubo";
purple-remote "setstatus?status=available&message=Available";
fi

Make it executable:
chmod +x /path/to/your/script.sh

And finally, put your shell script on the crontab to check it every minute:
* * * * * /path/to/your/script.sh

Actually, all this stuff is more cool than really useful. Just a weekend project I wanna share :P

sexta-feira, 24 de julho de 2009

Libvirt now supports IBM Power Hypervisors

Yeah, that's it: Yesterday the my first patch were pushed into the main tree of Libvirt's repo. It will be available in the next version, libvirt-0.7.0[1], scheduled to be released in the end of this month. This lib now has the power[2], to manage IBM Power Hypervisors through HMC/VIOS and IVM :)

Libvirt is a library that creates an abstraction layer by exporting a generic API above a virtualization system. You can create your own virt-manager-like software using libvirt and you'll be able to manage most sorts of virtualization systems. It started to be used only with Xen, but many other drivers were made other different systems: KVM, Openvz, VMWare, VirtualBox and so on.

My job at LTC is to design and implement a driver that could manage both HMC/VIOS and IVM systems. This is the first version, a lot of features are planned to be done. Wait for more news :)

[1] - Also known as "double-o-seven release".
[2] - This joke has no effect in portuguese.

quarta-feira, 22 de julho de 2009

Gtk replacements for Qt applications

And the story is pretty simple: I avoid using Qt application. I don't have any technical arguments for such opinion. The point is that Gtk applications just look more beautiful than Qt based :)

And besides, I really can't use full desktop environments like KDE or even Gnome. So, I use OpenBox with a lot of Gtk-based applications. It gets really fast and simple to use. But ok, enough talk. Let's get to business:
Talking a little more about my favorite window manager, there is two ways to start applications automatically on OpenBox:
  • You may put the commands you would like to be started at ~/.xinitrc - if you are doing startx or if your login manager reads the ~/.xinitrc file
  • Or put them at ~/.config/openbox/autostart.sh instead.
Have fun :)

*Thanks to Ursinha
**Thanks to Carlos Costa
***Thanks to Edjunior


quarta-feira, 24 de junho de 2009

FISL10, primeiro dia

English spoken folks, this is gonna be in pt_BR only, sorry.

Primeiro dia de palestras no FISL 10: Frio, filas e internet que não funciona. Só isso. Brincadeira, tem coisas boas também.

Credenciamento para imprensa/blogs:
O primeiro dia de FISL foi marcado principalmente pela organização ruim do FISL que não dá kit para pessoas da imprensa / blog. Bem, essa separação de um crachá pra imprensa e outro para blogs já é algo que não desceu bem, principalmente hoje em dia e principalmente em se tratando de FISL. E outra, eu paguei normalmente, certo? Por que eu não posso ganhar um kit?

O kit
"Mas até a bolsa você quer?" Sim, já que o cronograma foi impresso num formato de jornal de domingo e só cabe naquela bolsa. Fora o fato que também é mais fácil de acessar durante o evento. Falando mais desse cronograma, pessoal de arquitetura de informações passou bem longe dele. Fizeram uma tabela com vários espaços em branco gerando uma tabela imensa, o que poderia ser reduzido a algo mais compacto e fácil de visualizar.

A infra
Bem a infra já não é culpa do da organização do FISL. Cheguei cedo com a Ursinha e o wireless estava redondo e navegando normal. O sinal do AP ao longo do evento é sempre bom... MAS com a chegada de todos os grupos de usuários do mundo inteiro a coisa complicou um pouco. A medida que a moçada foi chegando, vários AP's foram subindo. Meio dia e a internet já estava inavegável (essa palavra existe?). A quantidade massiva de AP's em mesmos canais estava degradando demais TODO o wireless do evento. Pronto, agora só por cabo.

Mas tem ponto positivo, certo? Sim, palestras.

DNSSEC mess
D. J. Bernstein falou de todos os problemas que a implementação do DNS atual tem. Ataques de hijacking e similares, falou do pequeno acréscimo de seguranção que o DNSSEC introduz e a quantidade de bagunça que ele faz. Falou também o quanto um AP's é vulnerável com um simples script, coisa pouca mesmo.

Redes mesh
Taí, sabe aquele problema do pagrágrafo da infra? Então, resolvido com redes mesh. Se todos os AP's fossem levantados como multiplicadores em oníssono, todo mundo ia ter internet rápida e redonda. Palestra pouco técnica, mas levantou uma bola pra galera da organização de eventos grandes (Campus Party e Encontro da Locaweb, por exemplo). Comecem a pensar, gente. (não sabe o que são redes mesh?)

OpenEmbedded
Boa palestra do Salveti sobre um framework para cross build de aplicativos. Projeto que elimina toda aquela burocracia e trabalho para a cross compilação. Só quem já trabalhou com isso sabe como é complicado a nada trivial.

Amanhã tem mais. Aliás, preciso fazer juz ao crchá que me deram. :-D

domingo, 24 de maio de 2009

libssh-0.3 released

Meta information: I'll start posting in english. The reason is pretty simple, some folks outside Brazil started to "read" this humble webblog these days, this includes my libssh friends and some other buddies :) This also should supply this lack of posting I am facing lately - I think.

This last thursday (21st / may) libssh-0.3 was released in its brand new website! But for what libssh is used for? From the official website: "The ssh library was designed to be used by programmers needing a working SSH implementation by the mean of a library. The complete control of the client is made by the programmer. With libssh, you can remotely execute programs, transfer files, use a secure and transparent tunnel for your remote programs. With its Secure FTP implementation, you can play with remote files easily, without third-party programs others than libcrypto (from openssl)." Congratulation folks :)

Check it out! Literally, I mean, the SVN repository.

quinta-feira, 30 de abril de 2009

FISL10 está chegando

Mais uma edição do FISL está chegando e nesse eu vou. Não só eu, mas a família inteira vai (@guilhermeprado, @klebersouza, @ursinha e eu). Primeiro FISL, já avisei o chefe que vou tirar os dias e depois fazer hora extra pra repor, quero aproveitar as palestras, discussões, stands e tudo que eu não vi até hoje ao vivo. Por que internet taí pra isso né? Eu nunca fui AO VIVO ao FISL, mas sempre vi as notícias, fotos e vídeos das palestras. No fundo no fundo é como todos os outros eventos técnicos, não se vai pela informação - isso a gente pode consumir depois ou até durante se for mais exigente - vai ser pelas pessoas.


Mas o que eu espero mesmo? Espero que não aconteça o que aconteceu em todos os eventos sobre internet que eu fui até agora: Eu não conhecia muita gente, conversava com meia dúzia e o principal: Internet era meu hobby e não meu trabalho. Agora eu vou estar lá! Serão computeiros, linuxeiros, camisetas engraçadas, Stallman, PirateBay e por ai vai. E a idéia é conhecer pessoas, trocar experiências, conhecer aquelas que só se conhece pela internet. Pretendo voltar a movimentar mais esse espaço e postar sobre impressões, palestras e tudo que eu achar que devo compartilhar por aqui. Aguardem. :)

quinta-feira, 8 de janeiro de 2009

Ajude a promover o grupo em torno do Livro do VIM

"VIM! Typing like a hurricane!"
Mini-paródia de Rock You Like a Hurricane dos Scorpions


Ano novo, projeto novo. Os primeiros dias de 09 nem chegaram direito ainda e eu já me meti num projeto novo e no mínimo interessante. Iniciado pelo colega (e também vim-addicted) voyeg3r, o Vimbook é um projeto de um livro opensource escrito em LaTex que tem por objetivo reunir e explicar (em claro pt_BR) comandos básicos, funções avançadas e dicas interessantes do editor mais legal que existe :-). Gosteu? Junte-se a nós e contribua! :-)